�ʐM�i�N���C�A���g�j
2013/11/29
Android�A�v���ŁA�{�^������������T�[�o�[�ڑ�����A�v�����쐬���܂��B
����
| OS |
Windows 7 Professional Service Pack 1 |
| eclipse |
4.2.2 |
| Android |
4.4 |
| Android�[�� |
Nexus7 |
�@eclipse��[File]-[New]-[Project]��I�����܂��B
�ANew Project�E�B���h�E���J������[Android]-[Android Application Project]��I�����uNext�v�{�^���������܂��B
�BNew Android Application�E�B���h�E���J������uAplication Name�v�� AndroidSocketClient �Ɠ��͂��uNext�v�{�^���������܂��B
�CConfigure Project�E�B���h�E���J�����炻�̂܂܁uNext�v�{�^���������܂��B
�DConfigure the attributes of the icon set�E�B���h�E���J�����炻�̂܂܁uNext�v�{�^���������܂��B
�ECreate Activity�E�B���h�E���J�����炻�̂܂܁uNext�v�{�^���������܂��B
�FBlank Activity�E�B���h�E���J�����炻�̂܂܁uFinish�v�{�^���������܂��B
�ҏW
�{�^����lj����܂��B
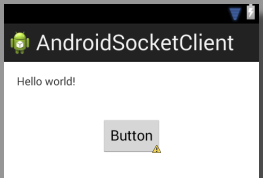
activity_main.xml �Ƀ{�^�����������Ƃ��ɌĂ�������NjL���܂��B
|
activity_main.xml
|
1:
2:
3:
4:
5:
6:
7:
8:
9:
10:
11:
12:
13:
14:
15:
16:
17:
18:
19:
20:
21:
22:
23:
24:
25:
26:
27:
|
<RelativeLayout xmlns:android="http://schemas.android.com/apk/res
 /android" /android"
xmlns:tools="http://schemas.android.com/tools"
android:layout_width="match_parent"
android:layout_height="match_parent"
android:paddingBottom="@dimen/activity_vertical_margin"
android:paddingLeft="@dimen/activity_horizontal_margin"
android:paddingRight="@dimen/activity_horizontal_margin"
android:paddingTop="@dimen/activity_vertical_margin"
tools:context=".MainActivity" >
<TextView
android:id="@+id/textView1"
android:layout_width="wrap_content"
android:layout_height="wrap_content"
android:text="@string/hello_world" />
<Button
android:id="@+id/button1"
android:layout_width="wrap_content"
android:layout_height="wrap_content"
android:layout_below="@+id/textView1"
android:layout_centerHorizontal="true"
android:layout_marginTop="35dp"
android:onClick="button1_click"
android:text="Button" />
</RelativeLayout>
|
|
MainActivity.java �� Socket �̐ڑ����������܂��B
|
MainActivity.java
|
1:
2:
3:
4:
5:
6:
7:
8:
9:
10:
11:
12:
13:
14:
15:
16:
17:
18:
19:
20:
21:
22:
23:
24:
25:
26:
27:
28:
29:
30:
31:
32:
33:
34:
35:
36:
37:
38:
39:
40:
41:
42:
43:
44:
45:
46:
47:
48:
49:
50:
51:
52:
|
package com.example.androidsocketclient;
import java.io.IOException;
import java.net.Socket;
import java.net.UnknownHostException;
import android.os.Bundle;
import android.app.Activity;
import android.util.Log;
import android.view.Menu;
import android.view.View;
public class MainActivity extends Activity
{
@Override
protected void onCreate(Bundle savedInstanceState)
{
super.onCreate(savedInstanceState);
setContentView(R.layout.activity_main);
}
@Override
public boolean onCreateOptionsMenu(Menu menu)
{
getMenuInflater().inflate(R.menu.main, menu);
return true;
}
public void button1_click( View v )
{
Socket con = null;
try
{
Log.d( "INFO", "START Socket" );
con = new Socket( "127.0.0.1", 9876 );
Log.d( "INFO", "OK Socket" );
con.close();
}
catch ( UnknownHostException e )
{
Log.d( "ERROR", "Socket(1)" );
e.printStackTrace();
}
catch ( IOException e )
{
Log.d( "ERROR", "Socket(2)" );
e.printStackTrace();
}
}
}
|
|
���s�����Ƃ���G���[���ł܂����B
java.net.SocketException: socket failed: EACCES (Permission denied)
AndroidManifest.xml �� uses-permission ��lj����܂��B
|
AndroidManifest.xml
|
1:
2:
3:
4:
5:
6:
7:
8:
9:
10:
11:
12:
13:
14:
15:
16:
17:
18:
19:
20:
21:
22:
23:
24:
25:
26:
27:
28:
29:
|
<?xml version="1.0" encoding="utf-8"?>
<manifest xmlns:android="http://schemas.android.com/apk/res/andr
oid"
package="com.example.androidsocketclient"
android:versionCode="1"
android:versionName="1.0" >
<uses-sdk
android:minSdkVersion="8"
android:targetSdkVersion="18" />
<uses-permission android:name="android.permission.INTERNET">
</uses-permission>
<application
android:allowBackup="true"
android:icon="@drawable/ic_launcher"
android:label="@string/app_name"
android:theme="@style/AppTheme" >
<activity
android:name="com.example.androidsocketclient.MainAc
tivity"
android:label="@string/app_name" >
<intent-filter>
<action android:name="android.intent.action.MAIN"
/>
<category android:name="android.intent.category.
LAUNCHER" />
</intent-filter>
</activity>
</application>
</manifest>
|
|
�ēx���s�����Ƃ���ʂ̃G���[���ł܂����B
java.lang.IllegalStateException: Could not execute method of the activity
�A�N�e�B�r�e�B�ł͂��̊��͎��s�ł��Ȃ��A�Ƃ��������e�ł��傤���B
AsyncTask ����h������ MySocket �Ƃ����N���X�����A������Ŏ��s�����悤�ɏC�����܂��B
|
MySocket.java
|
1:
2:
3:
4:
5:
6:
7:
8:
9:
10:
11:
12:
13:
14:
15:
16:
17:
18:
19:
20:
21:
22:
23:
24:
25:
26:
27:
28:
29:
30:
31:
32:
33:
34:
35:
36:
37:
38:
39:
40:
41:
42:
43:
44:
45:
46:
47:
48:
49:
50:
51:
52:
53:
54:
55:
56:
57:
|
package com.example.androidsocketclient;
import java.io.IOException;
import java.net.Socket;
import java.net.UnknownHostException;
import android.app.Activity;
import android.net.Uri;
import android.net.Uri.Builder;
import android.os.AsyncTask;
import android.util.Log;
import android.widget.TextView;
public class MySocket extends AsyncTask<Uri.Builder, Void, String>
{
private Activity mAct;
public MySocket( Activity act )
{
super();
mAct = act;
}
@Override
protected String doInBackground( Builder... arg0 )
{
Log.d( "INFO", "START doInBackground" );
Socket con = null;
try
{
Log.d( "INFO", "START Socket" );
con = new Socket( "127.0.0.1", 9876 );
Log.d( "INFO", "OK Socket" );
TextView txt
= ( TextView )mAct.findViewById( R.id.textView1 );
// txt.setText( "Socket OK!!" );
con.close();
}
catch ( UnknownHostException e )
{
Log.d( "ERROR", "Socket(1)" );
e.printStackTrace();
}
catch ( IOException e )
{
Log.d( "ERROR", "Socket(2)" );
e.printStackTrace();
}
Log.d( "INFO", "E N D doInBackground" );
return null;
}
}
|
|
txt.setText() �����s�����Exception�ňُ�I������̂ŁA�R�����g�A�E�g���Ă��܂��B
MainActivity �� MySocket �� execute �����s����悤�ɕύX���܂��B
|
MainActivity.java
|
1:
2:
3:
4:
5:
6:
7:
8:
9:
10:
11:
12:
13:
14:
15:
16:
17:
18:
19:
20:
21:
22:
23:
24:
25:
26:
27:
28:
29:
30:
31:
32:
33:
34:
35:
36:
37:
|
package com.example.androidsocketclient;
import android.net.Uri;
import android.os.Bundle;
import android.app.Activity;
import android.util.Log;
import android.view.Menu;
import android.view.View;
public class MainActivity extends Activity
{
@Override
protected void onCreate(Bundle savedInstanceState)
{
super.onCreate(savedInstanceState);
setContentView(R.layout.activity_main);
}
@Override
public boolean onCreateOptionsMenu(Menu menu)
{
getMenuInflater().inflate(R.menu.main, menu);
return true;
}
public void button1_click( View v )
{
Log.d( "INFO", "START button1_click" );
Uri.Builder params = new Uri.Builder();
MySocket soc = new MySocket( this );
soc.execute( params );
Log.d( "INFO", "E N D button1_click" );
}
}
|
|
���s���Ă݂܂��B
�T�[�o�[���� LinuxC �� �ʐM�i�T�[�o�[���j ���g���܂����B
�܂��̓T�[�o�[�������s���܂��B
# ./LC112Server
17:42:38 SV LC112Server START
17:42:38 SV �ڑ���҂��Ă��܂�
������ Android�������s���{�^���������Ă݂܂��B
LogCat�Ɉȉ��̃��O���o�܂����B
11-29 17:43:39.058: D/INFO(18531): START button1_click
11-29 17:43:39.058: D/INFO(18531): E N D button1_click
11-29 17:43:39.058: D/INFO(18531): START doInBackground
11-29 17:43:39.058: D/INFO(18531): START Socket
11-29 17:43:39.078: D/INFO(18531): OK Socket
11-29 17:43:39.078: D/INFO(18531): E N D doInBackground
���܂��������悤�ł��B
�T�[�o�[��������ƁA�ڑ����t�����b�Z�[�W���M�����I���̓��͑҂��ɂȂ��Ă��܂����B
17:43:15 SV accept OK
17:43:15 SV ----------------------------------
17:43:15 SV (1) send messase
17:43:15 SV (9) end
17:43:15 SV input number:
Android���i�N���C�A���g���j�ɂ͎�M���������Ă��Ȃ��̂� 9�ŃT�[�o�[���I�������܂��B
17:43:15 SV input number: 9
17:45:09 SV �I�����܂��B
17:45:09 SV LC112Server END
�� PageTop �� Home
Copyright (C) 2013 ymlib.com